
In this tutorial, we will show you how to Optimize, Compress, and lazy load images in WordPress. We will use the free Smush Image Compression and Optimization plugin. First, we will walk you through installing and setting up the plugin to bulk compress, optimize, and lazy load images in WordPress. Then, we’ll show you how to modify the settings within the Smush plugin.
Install Smush Image Compression and Optimization
- Log into your WordPress Dashboard.
- Click Plugins, then Add New.
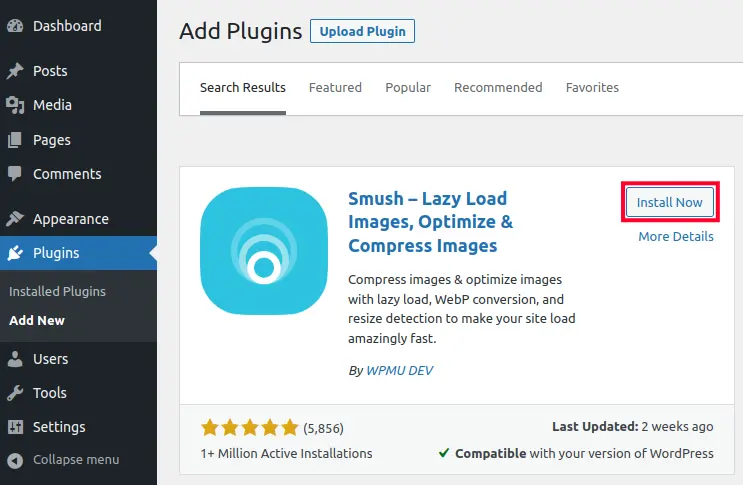
- Type ‘smush’ in the search field. When you see the Smush – Lazy Load Images, Optimize & Compress Images plugin by WPMU DEV, click the Install Now button.
- Once installed, click the Activate button to enable the plugin.
Setup Smush to Optimize & Compress Images
Now that you have installed the Smush – Lazy Load Images, Optimize & Compress Images plugin, we will show you how to use it to optimize and compress images on your WordPress site. Since we are using the free version, it can only bulk process 50 at a time, so this may take several tries to complete.
- Login to your WordPress Dashboard if you haven’t already.
- Click the Smush link in your main Dashboard menu.
- You will then see a setup wizard pop-up, click the Begin Setup button.
- On the next screen, select if you want to Automatically optimize new uploads then click the Next button.
- Choose if you want to Enable enhanced multi-pass lossy compression is enabled then click Next.
- Select if you want to Strip my image metadata then click Next.
- Choose if you want to Enable Lazy Loading then click the Next button.
- On the last page select if you want to Allow usage data tracking then click the Finish Setup Wizard button. It will then check your site to determine what images need optimized and compressed.
Modify the Bulk Smush Settings
- Click the Smush then Bulk Smush link in your WordPress Dashboard.
- You can then scroll down to the Settings section and modify your image compression options as needed.
- You can then scroll down and adjust the default settings as needed.
- Click the Save Changes button after modifying your bulk smash settings.
Modify Lazy Loading Settings
- In your WordPress Dashboard, click Smush then Lazy Load.
- Scroll down to the Lazy Load section and click the Activate button if it isn’t already enabled. You will then see a message stating “Lazy loading is active.” This means that it is running with the default settings.
- You can then scroll down and adjust the default settings as needed.
- Click the Save Changes button after modifying your lazy loading settings.
Congratulations, now you know how to optimize, compress, and lazy load images in WordPress with the Smush Image Compression and Optimization plugin!
Become a master of WordPress plugins! Protect, optimize, secure, and expand the functionality of your website easily with the help of WordPress plugins!